Tuesday, July 28, 2009

Sizzix!


Having lots of fun with my Sizzix, I decided to make a fused art quilt - that's right, fused, with NO sewing. I wanted the project to be kid friendly, and ready to make for those with no sewing machines. I ironed a fusible web like Wonder Under or Heat n Bond to the back of my fabrics. Then I trimmed the fabrics to squares that would fit into the Sizzix machines. Next I just ran them through as you would paper. Nifty!

For the basket I fused the web to the back of the fabric and cut a "bowl" shape. I clipped it from the top edge toward the bottom to make rows of warp for my weaving, cutting almost to the edge but leaving a space so the pieces would stay together. With a second fabric I fused, and then cut strips for my weaving, over under on the first row, and under over on the next. Of course I had peeled the backing paper off after cutting. After weaving I trimmed up the edges and fused the basket to the background, following manufacturer's directions.
Then I removed the backing paper from my Sizzixed flowers and placed them on the background. Again following the manufacturer's directions for heat and timing I fused the flowers onto the quilt. Flower arranging was never so easy!
Finally I cut strips for my binding, from fabric with the fusible web ironed on the back. To cut I used a decorative blade on my rotary cutter. Then I folded the strips over the edges and ironed in place. Art Quilt, finished!

Sunday, June 21, 2009

Friends!

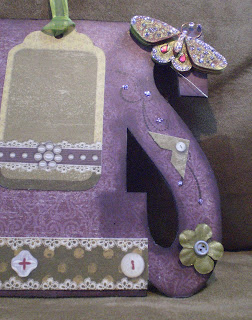
Celebrate FRIENDS - and family. My girls are the best! Alison and Jenny helped me with the basics, putting paper and ink on this new chipboard album from Accent Scrapbooking. Then I got to play with the toys. I used a variety of stamps, Tim Holtz inks, a Big Shot Sizzix, K & Co. stickers, Stickles glitter, Ranger embossing powder, some old buttons and lots of yarn and ribbon. Now all it needs is the addition of some photos. My grandaughter, Jade, was the technical advisor.


Monday, May 4, 2009

April in Boston, and then July!


Waiting for a new baby, my son and his family called on me for help! My daughter-in-law was put on bed rest, and when there's a three year old to care for that's a challenge. So I took an unexpected trip to the East coast, got to spend time with my family, a special birthday with my younger daughter and see gorgeous flowers. Oh yes, there was a lot of seafood and shopping, too. What fun!


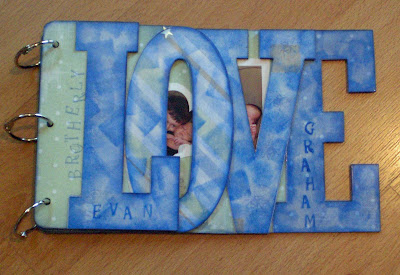
When I saw this month's LOVE album from Accent Scrapbooking my thoughts immediately went to a theme of "Brotherly Love" and so I prepped this little book for pix of my two grandsons. Here's the first photo of the big bro and little bro, and the book-in-progress. Each page of this chipboard book has an acrylic top piece in the shape of the letter - look closely.

Tuesday, April 7, 2009

March in Florida!


Thanks to a great home swap through http://www.homeexchange.com/ I spent March in Florida! Did you see the movie, The Holiday? Then you know what I'm talking about Take my word for it - coming from snowy mountains to the Treasure Coast is a real treat at this time of year. I was also lucky to find a great scrapbooking store in Lake Worth that had a couple of fun classes, and a very friendly and welcoming staff. Don't miss it if you visit that area! http://www.everythingscrapbook.com/

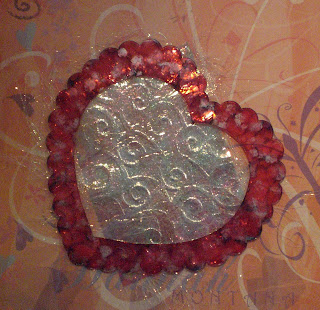
Using acrylic products and paper flowers from Accent Scrapbooking, I combined alcohol inks, embossing paste with a stencil, stamping and Stickles. Inside the heart I featured an embossed sheet of irridescent material, combined with Angelina fibers. Isn't it fun to learn new tricks?

Sunday, February 22, 2009

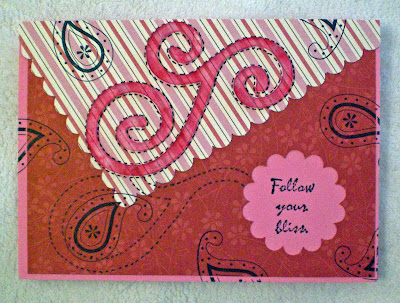
Follow Your Bliss!


This month's goodies from Accent Scrapbooking are all acrylic in a wide variety of shapes and sizes! I used alcohol inks and stamping, plus some sparkling hearts, Stickles glitter paints, and ribbons. My granddaughter saw the cute purses and buttons and said, "Oh, are you making me a necklace?" So, of course I did! I also used acrylic shapes and stamping combined with penstitching with my Pitt pen to embellish a couple of cards.

Saturday, January 31, 2009

Love My Journal!

Resolving at New Year's to do something creative every day (instead of wasting so much time!) I signed up for Jessica Wesolek's twenty-one day Love This Journal class, and am becoming an Art Journaling Diva! We're halfway through, and it's loads of fun. I'll post some pix of my extra pages, soon! We're not allowed to share our assignment pages. Here's her link http://www.lovethisjournal.com/index.html

Thursday, January 22, 2009

Acrylic!


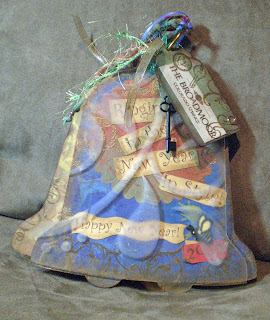
I worked up the nerve to decorate the large acrylic bell. At the suggestion of an online friend, I bought a can of Glass Frost, put a large stencil over the bell, and sprayed - luckily we had a warm day so I could work outdoors. After putting all the bells together on the
ring I added fibers, beads, and a decorated tag for a key holder.

There are so many possibilities on a base of bells! Bells ring joyously at many of life's happiest events, and toll on the saddest days of our lives. We think of Wedding Bells, bells at Easter and Christmas time, bells to ring in the New Year, and bells that mark other religious services. And then there are the everyday bells - for teachers and kids, bells ring in the promise of the year to come, signaling the arrival of Fall. Wouldn't it be fun to record a special family dinner, or a visit to a dude ranch using a "dinner bell" theme? Or a trip to Philadelphia to see the Liberty Bell? Or to commemorate a tour of the great cathedrals of the USA, or of London (Big Ben!), Rome or Paris?

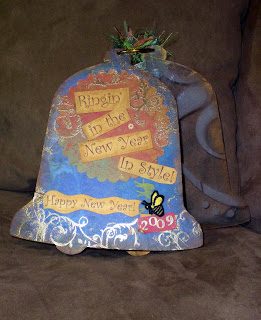
Do you hear what I hear? Happy New Year!

On the back cover, a photo of lights on the lake behind the hotel is above an artist's rendering of the same subject. The mini-bell is embossed with the new year. We hated to leave!

Golden Bee!


A stop at the Golden Bee was essential! Sing along honky tonk piano, the famous "Bee" cheese spread, and laughs watching people drink their yards of ale . . . it hasn't changed since I was a new teacher there forty years ago. Yikes! Copper alcohol ink decorates the acrylic frame from Accent Scrapbooking, and the embossing on the hotel folder is highlighted by chalk inks.

Flowers


Chipboard squares are accented with paper flowers with copper brads at center. The bathroom was enormous - all marble and beyond luxurious . . . wow, definitely the Sweet Life. Needing a pocket, I punched one with my Sizzix, for storing the key and the bill. More stamping, more embossing!

Acrylics & Pix


Using alcohol inks, I decorated the scalloped acrylic frame from Accent Scrapbooking. It was perfect to frame my picture of the Broadmoor's bell tower all decorated for the holidays. I tore the room number from our folder for this label, and started on the next bell. Another scallop circle here, half of it punched from a photo of our canopy beds . . . fit for royalty, with gold ribbon decorating the seam where the circle segments join.

Stamp & Emboss

For the first bell I punched a large scalloped circle with my Sizzix, ran it through my Xyron, and attached it to the bell. Although glitz usually isn't my thing, I make an exception for the holidays! Stamping and then embossing with metallic embossing powder adds sparkle as well as texture.

Chipboard


I started this project with the large chipboard bells from Accent Scrapbooking. First I covered one side with designer paper, using my favorite adhesive. Then I trimmed away the excess paper with my trusty swivel X Acto knife. Repeat for the reverse side. Sanding the edges with a sanding block or emery board smoothed things up and prepared the bells for inking, with sponge and inkpad. This makes the paper colors blend with the chipboard, by changing the chipboard edge color. Then the fun begins!

Happy New Year!


Happy New Year! I've been celebrating by creating a bell themed scrapbook to remember a special and surprise visit to the Broadmoor Hotel, planned by my younger daughter. We had such a great time we're hoping to make it an annual event. I'm using a great collection of products from Accent Scrapbooking, both chipboard and acrylic. I love new toys, and learning to use new things!